Setting up your electronic email account in Outlook is very simple. Here you can read the instructions to configure a new email account in Outlook 2016. These instructions allow you to set up an email account with the POP or IMAP protocol to get started receiving emails as soon as possible. We are not going to configure advanced settings or additional fields and just simply show the easiest way to get your email working. If you want to know the differences between POP or IMAP, please click here.
We are going to proceed to configure the account with a secure TLS connection. A clear configuration without encryption is simpler, but unless you have a good reason not to use a secure connection, we do not suggest using any email service on the Internet without encryption.
We are using as example the domain netz-test.com, replace it with the domain of your service or the appropriate details for your configuration. If you use a prior version to Outlook 2016, the interface may be slightly different but in most cases its very similar and the configuration is the same. Always try to use the latest versions of software for maximum security and compatibility with our services. If you are using an old edition, like Outlook Express or Outlook 2007 you should upgrade as they are already obsolete.
You need the following information to start:
- The username of the mailbox
- The password of the mailbox
- The server name of your email server, both incoming and outgoing
- The email server ports
You can consult these details from the control panel of your service, and they can be different depending on the email service you are trying to configure. Ask our technical support if you do not know where you find this information.
In most cases the username is the complete email address, for example, if the email account you wish to configure is bilbo@netz-test.com, then it is also the username unless it has been configured differently by the server administrator. For example, Postfix servers may in most cases use the username in a different way like bilbo.netz-test as username instead of the address.
The password is the one you have setup for the mailbox, as such it is the email password you selected while creating the email account in your service.
The server names, incoming and outgoing is usually the same for both. Unless you are sending emails with one server and receiving them through another one which would be unusual. An email account is setup on a single server, so it sends and receives emails in the same system. So if we say email server we refer here to both the incoming and outgoing server. In most cases it is simply your domain name, for example, netz-test.com or a subdomain like mail.netz-test.com. However, since we are going to use a secure connection, it is very likely that your domain does not have a proper SSL certificate, and as such, if you use your domain name, Outlook will show a certificate error each time you try to connect. To avoid this issue, you should just use your server name instead of your domain name.
Please consult your hired service to obtain your server name. It could be different for every domain you have hired depending on the assigned server on the purchase.
The ports of the email server are also usually different. It is possible that the administrator is using different ports instead of the common ones and the ports are different depending if you are using a clear or a secure SSL connection or if you configure the account as IMAP, POP or Exchange. So the ports are different depending on the protocol used and the type of connection. In Netz0, we use the official standard ports to simplify the email configuration. It means the ports Outlook or your email software suggests as defaults, are the ones you can use. Please do not hesitate to contact us if you need specific information on how to find this information for your service.
The majority of services work if you copy the instructions we present here.
STEP 1
Open the Outlook software on your PC and go to the File menu.

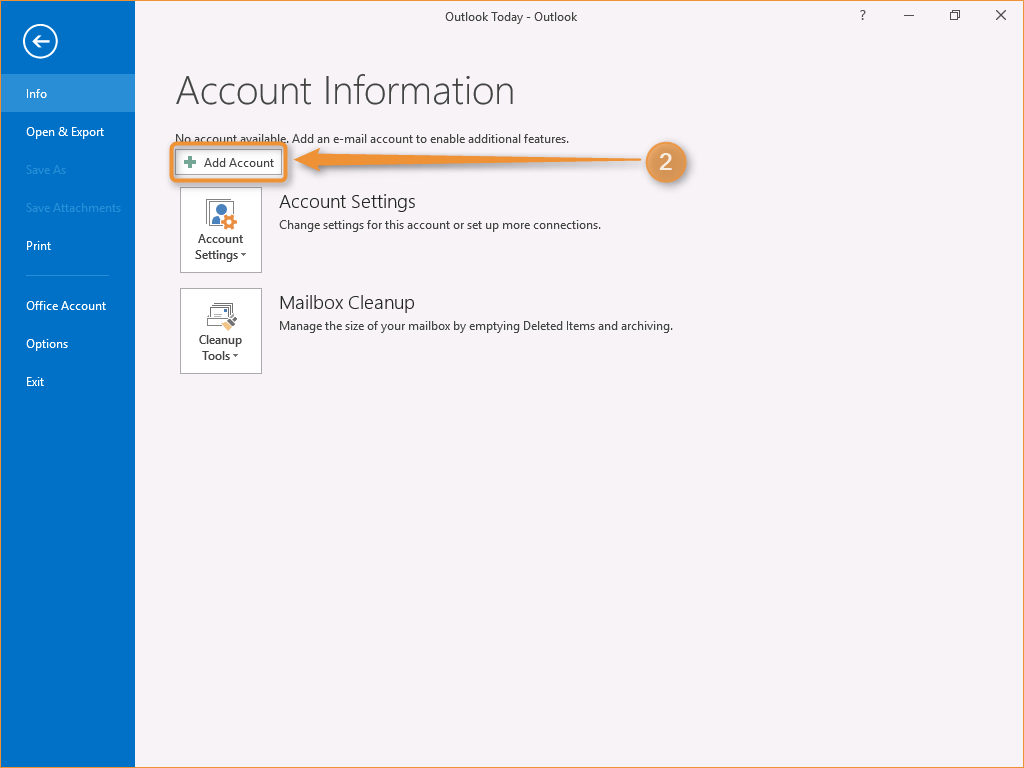
STEP 2
Click on Add Account to add the new email account.
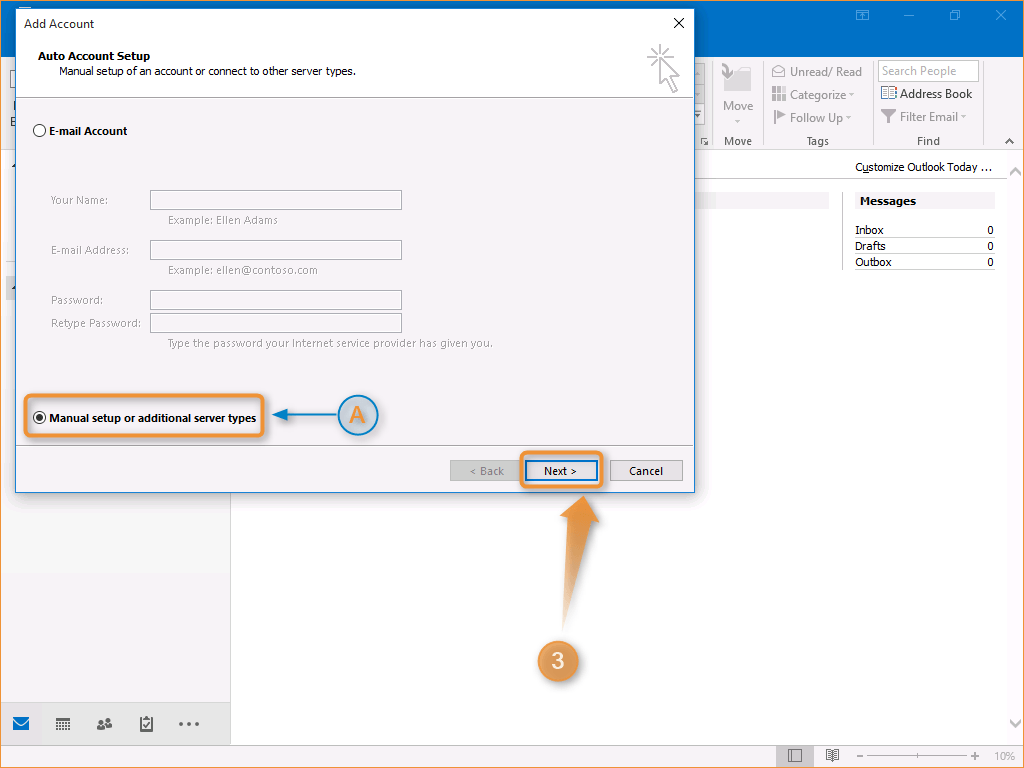
STEP 3
This menu allows you to setup a new email account. In the first option, Outlook tries to detect the configuration of your server automatically, however, in most cases this does not work properly, or you could obtain incorrect details, so instead we are going to proceed with a manual account configuration.
To configure the account manually select the second option called Manual setup or additional server types
Then click the Next button to continue.
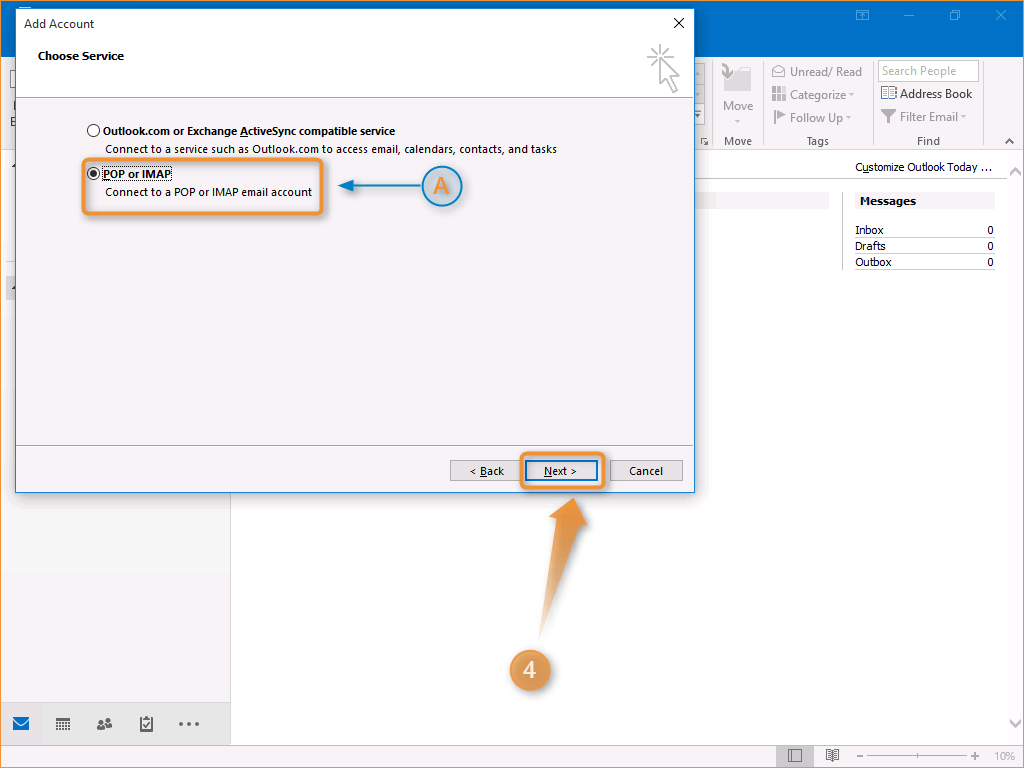
STEP 4
Here we can select the protocol to be used while establishing communications with the server. POP and IMAP are standard email protocols for electronic mail on the Internet, so those are the ones we use in this guide. The Exchange ActiveSync protocol (EAS) is a proprietary protocol from Microsoft and only works in Microsoft Exchange or compatible servers which are properly licensed, for example, our email service NetzMail PRO allows you to use this protocol.
All other email servers otherwise use POP or either IMAP. Netz0 services support both protocols POP and IMAP so you can select the one you prefer.
Select the option POP or IMAP and then click the Next button.
STEP 5
It is one of the most important steps because here you configure the details of the email account. Note that you cannot change the type of protocol POP or IMAP once the account is setup since it is not a good idea to mix protocols, for this reason if you select one option, you cannot change it without having to delete the account and configuring it again on Outlook.
The steps are different depending if you want to use POP or IMAP. If you do not know what to use, just use POP, which is the default suggested by Outlook. If you wish to see the differences, please click here.
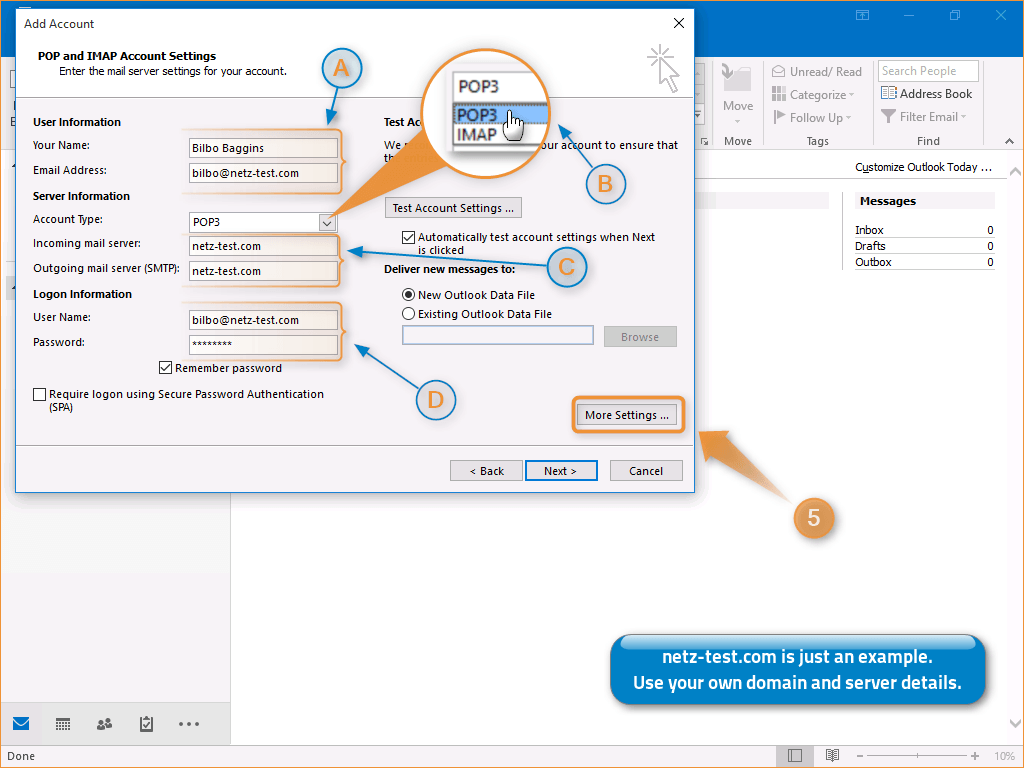
FOR POP CONFIGURATION
A) Enter your full name (as you want to appear to your recipients) and then enter your email address
B) Since we are setting up a POP mailbox, it is not necessary to change this option. POP is the first and default Outlook option.
C) In this field enter the domain name of your email server. As we explained previously, generally both fields are the same.
D) Enter here the username and password of the mailbox. It is your full email address. Please make sure you are entering your password correctly, Outlook does not confirm this until the next step, and it is common to type it wrong here stopping you from configuring the email account correctly.
To continue configuring your mailbox click the button More Settings …
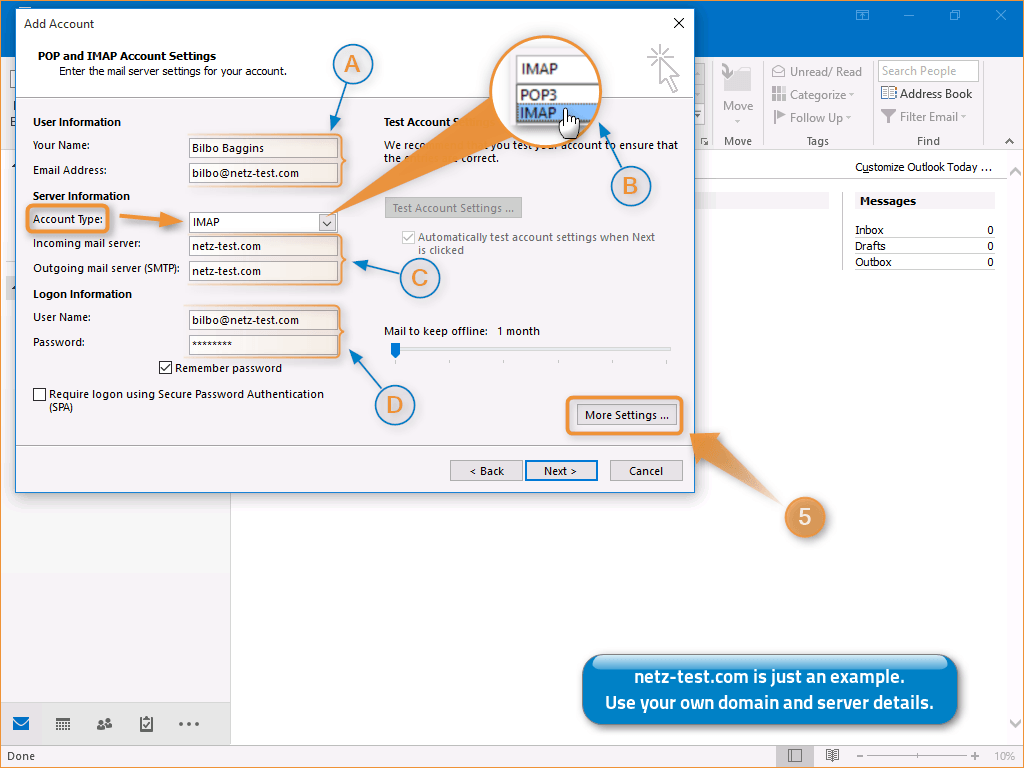
FOR IMAP CONFIGURATION
A) Enter your full name (as you wish to appear to your recipients) and then enter your email address
B) We are setting up an IMAP mailbox, so switch this option to IMAP for the account type field.
C) In this field enter the domain name of your email server. As we explained previously, generally both fields are the same.
D) Enter here the username and password of the mailbox. It is your full email address. Please make sure you are entering your password correctly, Outlook does not confirm this until the next step, and it is common to type it wrong here stopping you from configuring the email account correctly.
To continue configuring your mailbox click the button More Settings …
STEP 6
On this screen, we are only going to set up the requirements for the mailbox to work. You can complete all additional fields in the future if you wish. Click the tab Outgoing Server and continue to the following step.
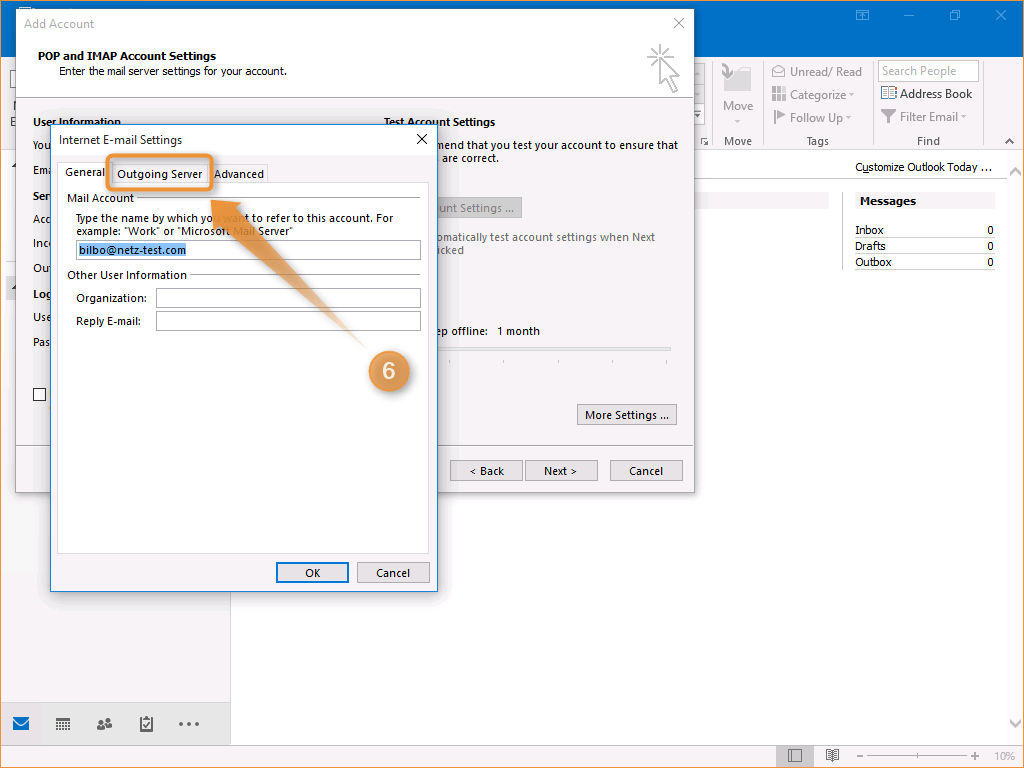
STEP 7
This step is critical and usually ignored, since many servers in the past allowed sending emails without requiring authentication. However, this is a security issue and today all email servers properly configured require authentication to avoid sending spam. It means that before being able to send a message, the user has first to authenticate with the server. All the services in Netz0 require this option. If the option is unchecked in Outlook, you will obtain an error if you try to send messages.
Mark the checkbox My outgoing server (SMTP) requires authentication. Then go to the tab Advanced

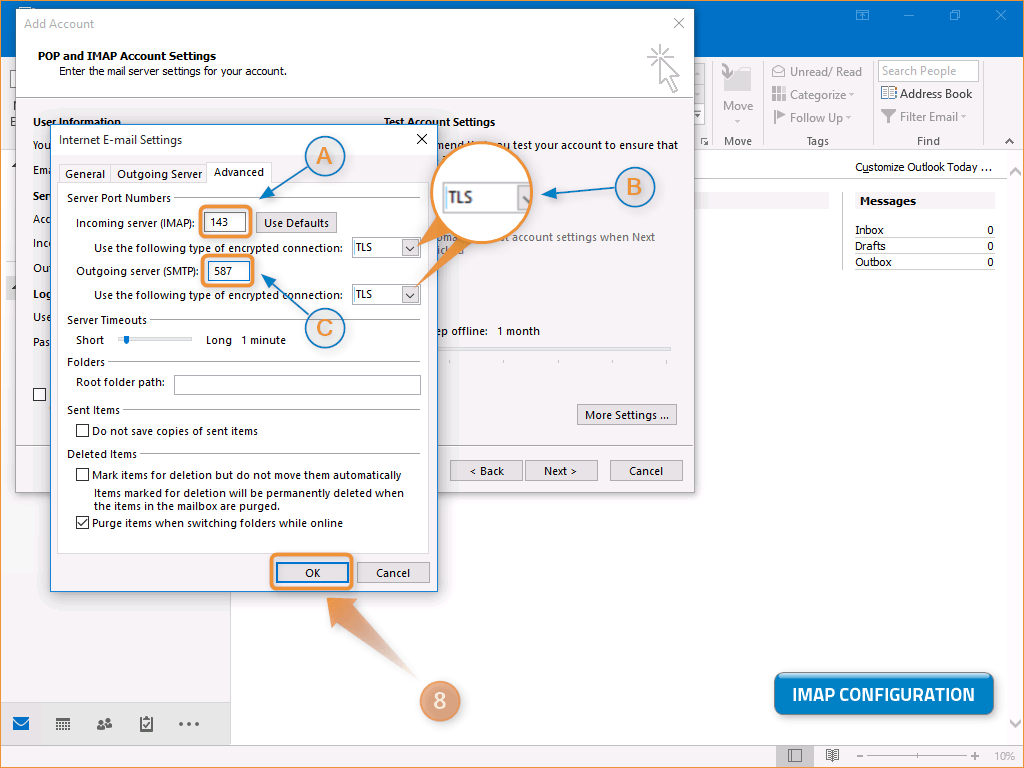
STEP 8
In this step, we configure the server ports with a secure connection. Remember that this configuration is different depending if you have selected POP or IMAP in step 5.
FOR POP CONFIGURATION
A) Mark the option This server requires an encrypted connection (SSL)
B) Outlook suggests the default port 995 which we are using. If it is different for your service, change it here.
C) In most cases the outgoing port is the 25. However, today most Internet providers block the port 25 for residential Internet users. If you are a company, you probably have a business Internet connection with a public IP; those connections usually don’t have restrictions which allow the use of port 25, however for a normal Internet connection, it is very unlikely that you can use port 25 to send emails on the Internet. Your Internet provider probably blocks the port to avoid spam incidents. Netz0 provides for those cases an alternative port which is 587. There is no difference between using one or the other. We use in our example 587.
D) Here we select a secure TLS for outgoing connections.
Finally, press the OK button

FOR IMAP CONFIGURATION
A) Outlook suggests the default port 143 which we are using. If it is different for your service, change it here.
B) Change both fields here to TLS to use an encrypted connection for both incoming and outgoing connections.
C) In most cases the outgoing port is the 25. However, today most Internet providers block the port 25 for residential Internet users. If you are a company, you probably have a business Internet connection with a public IP; those connections usually don’t have restrictions which allow the use of port 25, however for a normal Internet connection, it is very unlikely that you can use port 25 to send emails on the Internet. Your Internet provider probably blocks the port to avoid spam incidents. Netz0 provides for those cases an alternative port which is 587. There is no difference between using one or the other. We use in our example 587.
Finally, press the OK button
STEP 9
Now that everything is setup, Outlook attempts connecting to the server with the provided details for the email account. Press the Next button to establish the first connection to your email server. Note on your screen how you cannot change the protocol anymore. If you wish to change it, you will need to delete the account and start from zero.

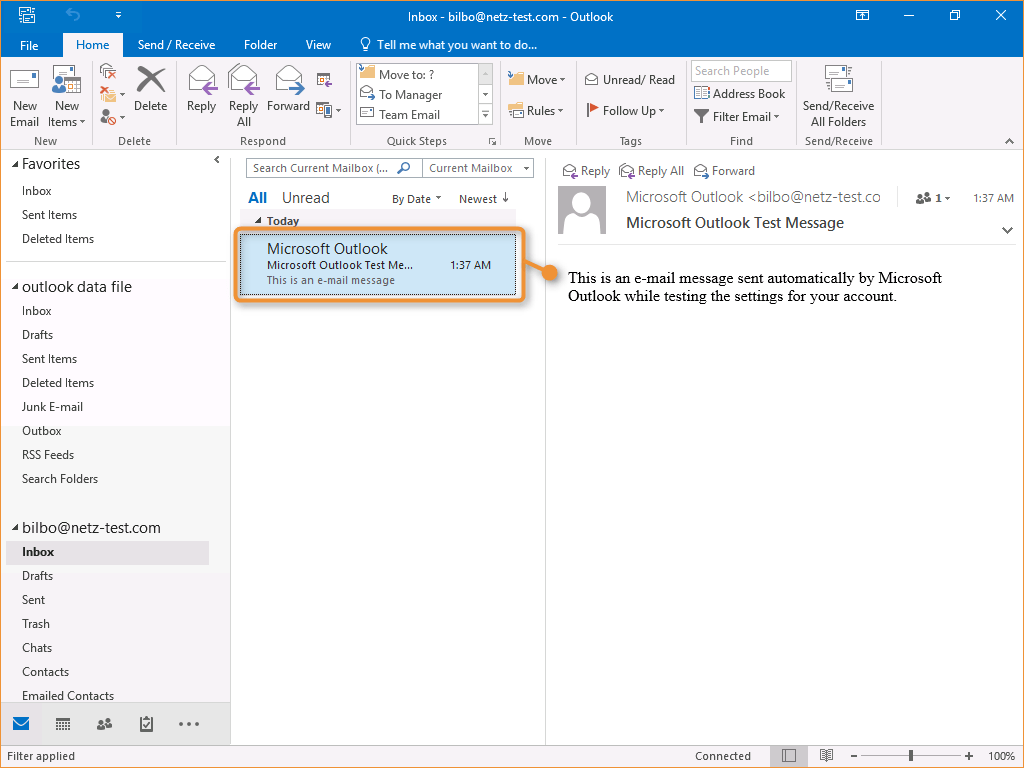
STEP 10
Outlook has now connected to your server and has sent a test message. This is the image you should obtain if everything is successful:
If this is not what you see, then an error occurred. You can verify how Outlook confirms with a green check both tasks it executed, the connection to the server and sending of the test message. The message is sent to yourself. It means that now you can send and receive emails to your new mailbox. The connection success screen is very similar both for IMAP or POP as you can see below:
The successful message
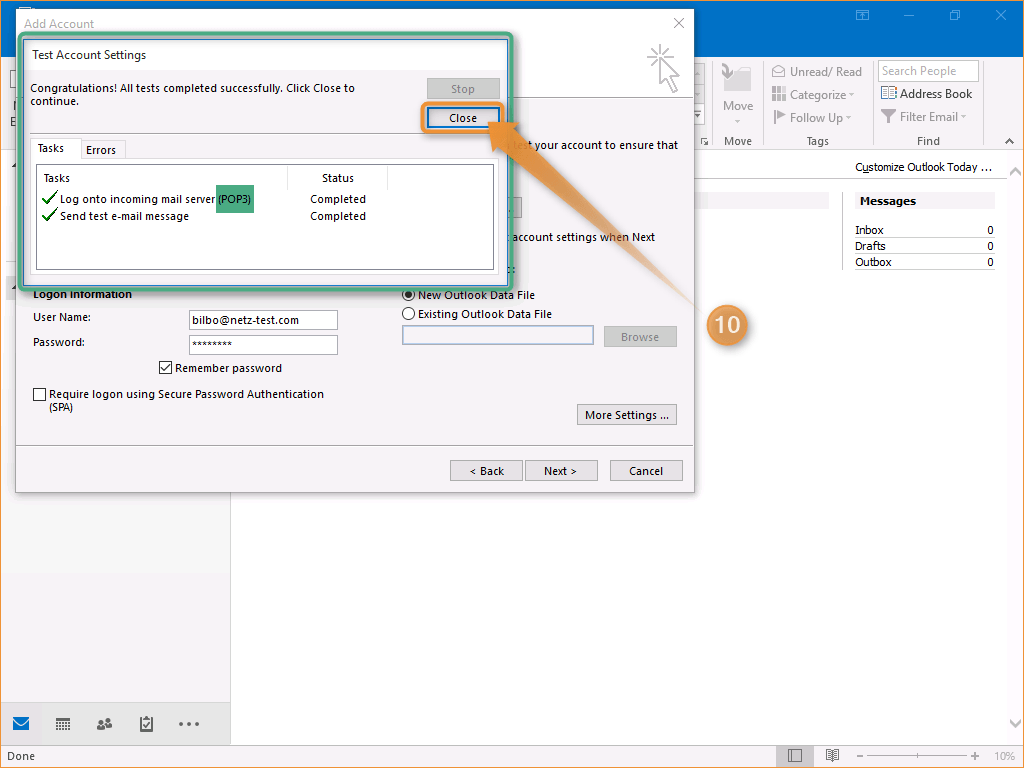
To close tasks dialog windows click the Close button.
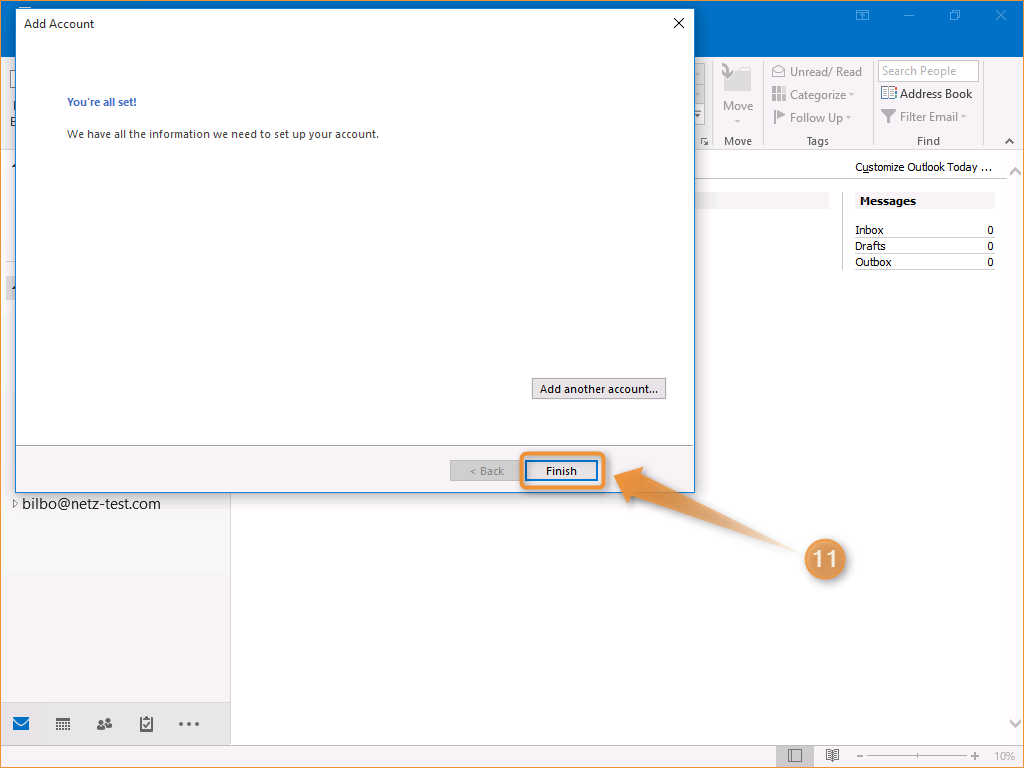
STEP 11
Congratulations! If you reached this far, it means you have successfully configured your mailbox. Press the Finish button to finalize.
The first thing you find in your inbox is the test message Outlook has sent in step 10. It confirms that your account is now properly configured and working. If you obtain an error or need assistance, please remember Netz0 offers 24x7 technical supports. Don’t hesitate to contact us if you require help.